Your Cart is Empty

The journey into wellness always calls for self exploration. We need to know ourselves and our health better than anyone else. What is causing our acne? What is clogging our sinuses? Inflammation? Joint pain? Lethargy? While we’ve all grown up being told that milk products would help us grow strong, many of us have found that we are better off sans dairy. We won't cover the countless studies done on the link between dairy products and several chronic and acute health issues; but, where there's smoke, there's fire. And we aren't playing to get burned.
This season we suggest also taking a holiday from dairy. In fact, take about a 2 to 4 week break. Take notes and find out what happens when you stop introducing a potentially inflammatory catalyst to your system. Most importantly, listen to your body. You might like what it tells you after a brief dairy hiatus. Yes, dairy products are in almost everything, but there’s an easy non-dairy substitute for most everything out there. Look for goat or sheep milk products, or opt for some nut milk alternatives like almond milk or coconut milk. We have some favorites on our list, but here are some easy ones to start adding to your rituals at home.
There are some seriously yummy delights out there that can be accomplished in the comforts of the kitchen at home. This way, there’s no hidden ingredients or chemicals that could potentially be harmful to our health. Share one of these recipes with a loved one, and let us know how it goes!

Almond milk is one of the finer things in life, but it doesn't have to be hard. Feel free to thank us later for this easy-breezy recipe that proves what real almond milk should taste like.
SERVING:2 cups
COOK/PREP TIME:30 minutes + overnight soak time
INGREDIENTS:- 1 cup raw almonds (we always recommend choosing organic, if available)
- 2 cups water, plus some additional for some post-soaking (check out our most recent blog on soaking to get the easy how-to guide)
- Sweetener (optional) and add until you reach your desired amount. Honey, sugar, agave syrup, or maple syrup -- based off personal preference.
EQUIPMENT:
- 2 cooking bowls
- Strainer
- Measuring cup
- Blender or food processor (based on preference)
- 2 medium bowls
- Fine-mesh nut bag, or cheesecloth
INSTRUCTIONS:
Remember the importance of soaking almonds, and how its natural nutrients will benefit the best with this easy step, as it’s critical, trust us. It removes the phytic acid that prevents the body from absorbing nutrients and enzymes. It will also ensure a more smooth and creamier final product. Side note: make sure to plan this in advance, as the soaking will need to be done the night before, at minimum 12 hours. A bit of a longer process, but 100% worth it.
1. Soak the almonds overnight, or up to 24 hours, in a smaller bowl with about 1 inch of water and cover with a kitchen cloth (another option is to refrigerate for 2 days). Just remember, the longer they soak, the creamier they will be!
2. Once almonds have been soaked (the almonds at this point, will be sponge-like which is the desired state), they need to be drained and then rinsed with cool running water, thoroughly. Please make sure to throw away the used water and not reuse it (it’s now filled with phytic acid).
3. Combine the almonds and fresh water using blender or food processor.
4. Blend together for about 2 minutes on high speed, with some pulsing in between to start breaking up the almonds, but then full throttle. The end-result consistency should be fine meal, and the color will be opaque & white (if using a food processor, do 4 minutes instead and continuously scrape down the sides so it’s evenly processed).
5. Pour the almond milk into the strainer, that’s placed on top of the measuring cup and lined with the cheesecloth or nut bag.
6. Gather the cloth and twist and squeeze all the juices out. You should get around 2 cups worth.
7. Taste, and sweeten if desired.
8. Almond milk will last for 2 days in a locked container in the fridge, so drink it while it’s fresh, and enjoy!
RECIPE NOTES:
There will be some leftover almond meal once all its juices have been squeezed out, which can be added to an assortment of items. Smoothies, oatmeal or even muffins! It can even be baked in the oven and frozen for several months to save as a dry good for future snacks. Yum!
Check out the video below on how we made almond milk with our local herbalist and partner, Lily Kunning.
This is a great treat in the a.m. after that hot yoga session, or an afternoon snack before those dinner cravings start kicking in.
SERVING:3 pints
COOK/PREP TIME:15 minutes + steam time
INGREDIENTS:
- 2 tablespoons raw arrowroot powder (a lesser known, flour alternative. Gluten, grain-free, vegan, and paleo-friendly)
- 4 cups almond milk
- ⅓ cup raw cashews
- ¼ teaspoon agar powder
- ¼ cup plain almond or coconut yogurt (we recommend one with 6 live cultures)
- 1 tablespoon maple syrup (optional)
- 1 teaspoon vanilla (optional)
EQUIPMENT:
- Blender or food processor (based on preference)
- 1 medium-size saucepan
- 1 large bowl for stirring
- Measuring cup
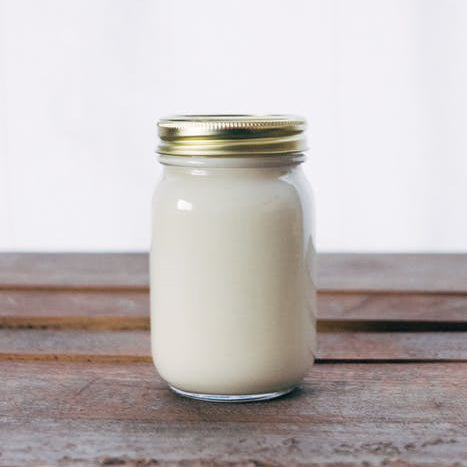
- 3 pint-size mason jars
- 1 pressure cooker
INSTRUCTIONS:
1. Combine the first 4 ingredients into a mixer, turn on high speed until completely blended.
2. Put mix into a saucepan, and cook over medium heat stirring constantly until there’s a simmer. Keep on heat for about 4-5 minutes, when the mixture has thickened. Turn off stove, and remove from heat.
3. Place in bowl for immediate cooling (until 110 degrees). Bowl will help cool quicker, so transfer from stove right away.
4. Mix the yogurt into the cooled ingredients mix. At this point, if desired, add the sweetener and vanilla for extra flavoring -- then divide into clean mason jars.
5. Add 1 cup of water to the pressure cooker liner, then place the steamer rack and 3 (clean) pint jars in the liner. Side note: make sure both mason jars and pressure cooker device have been sanitized before using.
6. Place the lid on the pressure cooker, and seal the device.
7. Steam for 1 minute, then remove steamer rack and pour used water down the sink.
8. Then place the mason filled jars onto the steamer rack (seal with lid again) and set to yogurt mode, and run for 8 hours. Side note: if you like a more tart yogurt, adjust to some additional time.
9. After patiently waiting, add your favorite toppings and enjoy! We love adding fresh fruit and granola for a healthy and nutritious snack any time of the day.
RECIPE NOTES:
You can refrigerate the yogurt for up to 2 weeks for a continuous fresh treat!

Coming in from a blistery day? We think this recipe from one of our very own tribe members beats a sugary and overly processed hot chocolate any day.
SERVING:1 cup
PREP/COOK TIME:Under 10 min
INGREDIENTS:- 4 Tbsp Loose Leaf Chai Tea
- 2 cups water
- 1 cup honey (raw, local is best)
- 1/2 cup RAW sugar
-3/4 cup almond milk (preferably homemade from the recipe above)
EQUIPMENT:
- 1 medium-size saucepan
- 1 glass jar (to store syrup)
- Measuring cup
- Tablespoon
INSTRUCTIONS:
To make the syrup,
1. In a medium-size saucepan, boil water and pour over loose leaf tea. Steep 4-5 min and strain.
2. Add tea concentrate, sugar and honey into saucepan and heat on medium. Stir consistently until all sugar and honey have melted into the tea.
To make the latte,
1. Take 3/4 cup almond milk and add 1/4 cup syrup.
2. Need it sweeter? Add up to 1/2 cup syrup to reach desired flavor.
RECIPE NOTES:
Syrup can be stored for up to 2 weeks in the refrigerator, and can be used as needed for more lattes as friends and family join you for the holidays.
Have a fun recipe to share this holiday season? We’d love to hear about it! Happy Holidays, from Balm, to our tribe.
